Adventures In Dairy Free Caramel Experiments: Part 3, Sunflower Butter Caramel Cups

Today is candy day!

Now, whether you are religious or not, I think that we can all agree that this weekend is basically the weekend of chocolate gluttony.

However, if you have a collection of annoying allergies such as myself, the five million aisles filled with egg and bunny shaped chocolate goodies is a total no go. 😦

If this makes you a sad velociraptor (WHY a velociraptor you ask? Because today is Velociraptor Awareness Day!!!) like it does me, then this recipe is for YOU!

I call these babies Sunflower Heaven Cups.

NOW, these are INCREDIBLE!

Think of them as the mating of a Cadbury Caramel Egg and a Reese’s Peanut Butter Cup.

Yep, they rock.
And the best part is there are no pesky allergens in this recipe!

There are three separate steps to this recipe. Say what?

First, you need to be sure you grab your Dairy Free Caramel that we made (and hopefully you still have left over) previously in Part 2 of this three part series of candy making. Since it needs to be stored in the refrigerator, you’ll have to nuke it a bit to get it to the right consistency again. I heated mine for roughly one and a half minutes.

20140418-132134.jpg

Now, this recipe itself is pretty easy. In all, it requires only six ingredients. I know, it’s pretty awesome. Also, the whole process between prep work and assembly only takes about thirty minutes total.

What you’ll need:

10 ounces of Enjoy Life Semi-Sweet Chocolate Chips
1 cup Sunflower Butter
1/2 cup Powdered Sugar
2 tablespoons Freshly Brewed Espresso
1 teaspoon Vanilla

20140418-132303.jpg

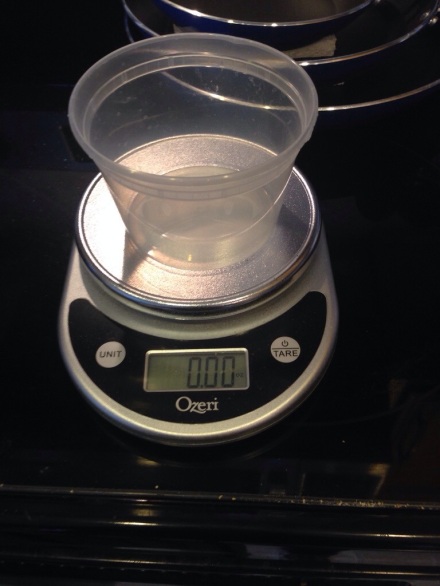
First, let’s prepare our chocolate. I used a food scale to measure out my chocolate.

20140418-132818.jpg

Don’t forget to hit tare!

20140418-132908.jpg

Now, if you’re like me, and you are a total failure at melting chocolate in a pan without scalding it, there is an easy solution guys.

What? You ask.

Setup a ghetto double boiler system, like so:

20140418-132647.jpg

You want to be sure that there is enough of the hot water on the bottom of the second bowl to melt the contents. Otherwise, it will take quite a bit longer to melt your chips if you are relying purely on steam to get the job done. It will work, but it will take longer.

Now, while your chocolate is working on melting, it’s time to prepare your sunflower butter mixture.

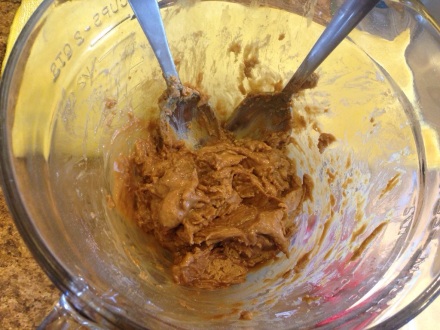
Take one cup sunflower butter and mix it with 1/2 cup powdered sugar. I warn you, this is going to become VERY THICK, and will be difficult to adequately mix together.

Which is why now, we will introduce two tablespoons freshly brewed espresso to add a little extra flavor, but also loosen it up a bit more.

This mixture is supposed to be THICK though, so be sure you don’t add too much. If it becomes too runny and less dense, you need to add more sunflower butter and powdered sugar. It needs to have a thickness similar to a cookie dough, in order to stay properly intact in your cups.

Add the 1 teaspoon vanilla to the mixture, and set off to the side for the moment.

20140418-133252.jpg

Once your sunflower butter mixture is finished, and your caramel is all heated up, all you need is for your chocolate to be completely melted and smooth. Don’t add anything to the chocolate. Because it’s difficult to find baking chocolate that is dairy, egg, soy, and nut free, Enjoy Life is the optimum brand, but their chips already come with all the additional tasty stuff, so we are good to go.

20140418-133656.jpg

So at this point, all of our ingredients for assembly are ready to go!

Take your muffin tin with cup liners, your melted chocolate, your sunflower butter filling, and your caramel, and line them up on the counter.

20140418-133750.jpg

Now, I like giant chocolate treats. So I am using a big muffin tin. If you happen to have a mini tin, and mini muffin liners, this recipe will obviously yield tons of Sunflower Heaven Bites (what I like to call the mini version).

First, fill the cup with a bottom layer of chocolate. It needs to be decently filled, otherwise you’ll have your insides sinking to the bottom and the chocolate gushing around it. No bueno.

20140418-134001.jpg

Once you have your bottom layer of chocolate, we’re good to add the first layer of filling: sunflower butter.

Take a small ball, about a tablespoon, and round it out, and flatten it.

20140418-134103.jpg

Place it in the chocolate. DON’T press it in there, just gently set it on top of the chocolate layer.

20140418-134143.jpg

Take a spoonful of caramel (just a spoonful of sugarrrrrr. Name that song!) and cover your sunflower butter layer.

20140418-134229.jpg

Now for the final layer: chocolate again.

20140418-134254.jpg

This recipe will yield roughly 8 Sunflower Heaven Cups. Obviously, depending on how much filling you include you can yield more. I, however, like lots of sunflower and caramel filling, so I used more chocolate to cover it all up.

When everything is done, be sure to put it in the fridge for at least an hour for the chocolate to harden.

20140418-134418.jpg

And finally, when all is said and done, you’ll have an absolutely delectable treat that is gluten free, dairy free, egg free, soy free, peanut free, and nut free.

20140418-134511.jpg

I suggest hiding them. I’m not good at sharing.

20140418-134539.jpg

ENJOY!

Pan Seared Bacon Wrapped Scallops and Oven Roasted Brussels Sprouts

Today, you’re in for a treat.

With the beginnings of Spring budding in the air, it’s time for some light and delicious dinners. Now, I don’t know about you, but I love me some seafood. And bacon.I’m pretty sure that the most wonderful dishes always include some form of shellfish. And the other wonderful dishes include bacon. So why not combine them?

Tonight is no different. Be prepared to salivate. I give to you the following wonders: Pan Seared Bacon Wrapped Scallops served with fresh Oven Roasted Brussels Sprouts and my wonderful mother’s very own recipe for Homemade Gluten Free Corn Bread.

Since I’m doing three separate things here, I’m going to go in a step by step process of how I coordinate different cooking times.

First, we have to prepare our cornbread and get that on to cook. It’s going to be one of the most time consuming items, but it will also sit out on the counter and cool, which frees up your oven space for your Brussels Sprouts in the future.

Side note: the cornbread is a super awesome dessert when drenched in honey and served with hot tea.

Let’s start.

Mama’s Homemade Gluten Free Corn Bread:
1 cup Jules gluten free flour.
1 cup Bob’s red mill gf corn meal,
4-5 tbs sugar ( I like mine sweet so I use 5),
4 tsp baking powder,
1/2 tsp salt.
1 egg or 1 egg replacer,
1 cup milk or equivalent (I like coconut milk for this recipe),
1/4 cup canola oil.

Now, mix all of your dry ingredients together first. If you like, as my mom and I both do, you can make a batch of the dry mix in batches, and store these in ziplock baggies to have around on hand for a quick addition to any meal.

Once your dry ingredients are all combined, set them off to the side for the moment. Now, mix your wet ingredients in a separate bowl, and mix them thoroughly. Go ahead and combine everything together. Be sure to mix thoroughly so there are no possible lumps in your mix.

Don’t forget to oil your pan. And for any of you fellow soy allergy sufferers out there, DON’T FORGET that cooking sprays include soy. I like to take just a little bit of vegetable oil on a paper towel and wipe down my pan.

Bake at 425° for 15-20 minutes or until golden brown.

When done, you should have something wonderfully tasty that looks like this:

20140417-183115.jpg

Now on to the Brussels Sprouts!

First, we’re going to start off with the following ingredients:

3 cups (roughly) washed and halved Brussels Sprouts
2 tablespoons olive oil
1 teaspoon Kosher salt
1 teaspoon garlic powder/black pepper/onion powder mixture
3 strips of bacon

20140417-183532.jpg

Take your Brussels Sprouts and put them in a large bowl with the 2 tablespoons of olive oil. Be sure to get them all equally covered. Then pour in your Kosher salt and your spice mixture to get them all covered deliciously.

Now, take out your bacon.

This is the easy, yet slimy, part. Take the 3 bacon slices and cut them into small strips that will go over the tops of your Brussels Sprouts.

Like so:

20140417-185954.jpg

20140417-190011.jpg

Tip: If your bacon is slightly frozen, it’s much easier to cut up your bacon without it sliding around on you.

Now, set your oven to 400 degrees and cook for 15-20 minutes minutes, when bacon has a nice golden crisp to it, and the Brussels Sprouts are tender when you put a fork through them.

They will look wonderfully delicious, much like the following:

20140417-195829.jpg

On to the Bacon Wrapped Scallops!

This will be the centerpiece of your dinner, at least it is in mine. Feel free to add anything to this meal, like a nice steak or some roasted chicken. However, for me, this is more than enough food.

What you’ll need:
3 large sea scallops
3 pieces of bacon
2 toothpick skewers

20140417-190246.jpg

Now heat up your skillet with one tablespoon of olive oil, and two tablespoons or minced garlic.

20140417-190342.jpg

Once your garlic is effectively browned, put your scallops on to cook. Now, you want to be sure to cook them on a lower heat. Scallops cook very quickly, but you also need to make sure the bacon is fully cooked.

Raw bacon is gross and unhealthy. I like to avoid getting trichinosis. Unless you’re my best friend. She eats her bacon mostly raw, merely warm. I know…ew.

In the end, my scallops came slightly unwrapped, but were still QUITE delicious.

Serve and enjoy.

20140417-195956.jpg

This meal is brought to you by Star Trek: The Wrath of Khan.

Nerd Chefs Unite!

This recipe is: gluten free, egg free, dairy free, soy free, peanut free, tree nut free, and paleo friendly!

Oh So Delicious Chicken Tikka Masala

So world, I apologize for my absence as of late, but life has been a bit hectic as of late. Life has gotten a little crazy, and full of medical bills. I’ve been battling a pretty serious infection, and because of that, I’ve been touring the hospital’s outpatient infusion center with a pic-line in my arm, because sadly I’m so allergic to the world, I’m also allergic to most oral antibiotics. So, IV antibiotics are the only way to go for me!

Sadly, the very tasty Sunflower Butter Caramel Cups are on hold for the moment. But I promise, they will be here next Wednesday, just in time for Easter Sunday, also known as Candy Sunday.

While I’m currently too tired and too drugged up to bake any fantastic creations at the moment, I do have a wonderful prized recipe that I’m ready to share with you all.

Fair warning: this recipe is super delicious and is a really fantastic comfort food.

SO, with that being said, I give you all: Chicken Tikka Masala

Now, whilst invading and occupying India, the British also invaded and took over a few recipes. Chicken Tikka Masala is a dish that is now classically associated with Indian cuisine, but is an Anglicized dish of an original.

Indian food is typically pretty safe for allergies. Why, you ask? Traditional Indian food actually leaves out a fair amount of dairy, and is also predominantly gluten free.

Now, this recipe is a total winner, and happens to be gluten free, dairy free, egg free, soy free, and paleo friendly.

Before we begin, this recipe is split into two parts: marinade for the chicken and the actual masala sauce.

What You’ll Need for the Chicken’s Marinade:

20140411-205916.jpg
4 Chicken Thighs or Boneless Breasts
1 Cup Greek Style Unsweetened Coconut Milk Yogurt
2 Teaspoons Cinnamon
1 Tablespoon Thai Spice Mix
1/2 Tablespoon Masala Spice mix
1 Teaspoon Garlic Powder

Side Note:
if you don’t have Thai Spice on hand (you can find it at your local spice shop or Whole Foods), you can create your own mix with equal measurements of paprika, turmeric, black pepper, coriander, fenugreek, ground mustard seed, cayenne, cumin, and ginger.

If you don’t happen to have Masala Spice on hand (which you can also find at a local spice shop or Whole Foods), you can create your own with a similar, almost identical mixture (though the subtle flavor differences will make a great impact later on). Masala Spice calls for an even mixture of paprika, coriander, turmeric, black pepper, fenugreek, mustard, cumin, cayenne, and ginger.

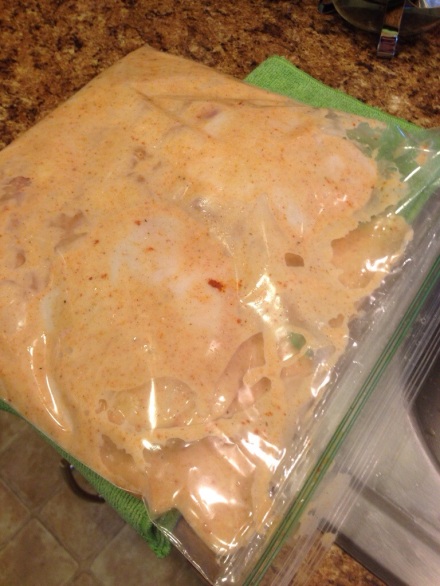
Now for that marinade! You’re first going to mix together your yogurt and spices in a mixing bowl. Once everything is mixed together nicely, you’ll have a pretty sweet, slightly orange colored marinade. Don’t let that turn you off, it will make your chicken taste AMAZING! So, put your chicken in a 1 gallon plastic bag and dump in your marinade.
At this point, you’re just gonna let your chicken do it’s chicken thing and just sit there in this deliciousness. So, let your chicken marinade either for at least 6 hours or overnight. I highly recommend letting it sit overnight, so that everything can just soak in to it’s full extent.

20140411-213148.jpg

And it’s time for the sauce!

What You Need for Your Tikka Masala Sauce:

1 1/2 Tablespoons Coconut Oil
3 Tablespoons Minced Garlic
2 Freshly Sliced Jalapeños (or to taste)
1 Sliced Red Bell Pepper
1, 8 ounce can of Salt and Sugar Free Crushed Red Tomatoes
3 Tablespoons Masala Spice
3 Tablespoons Thai Spice
1/4 Cup Water
1 Cup Unsweetened Plain Coconut Milk

Sauce Instructions:

First, you’re going to sauté your garlic and jalapeños in your coconut oil. Once your garlic and jalapeños have caramelized, be sure to add in your red bell pepper, and allow it to soften just a bit. Don’t let your red bell pepper caramelize, because it’s going to finish cooking the rest of the way in the sauce.

Once your pepper is added in, and softened up just a tiny bit, add in your crushed red tomato and mix thoroughly. You’re going to sauté the tomatoes, jalapeños, garlic, and red bell pepper just a little bit. Now, you’re going to let everything just sit there and come to a very slight boil on the outer edges. Once everything is boiling ever so slightly, add in the 1/4 cup of water, and mix everything together really well.

Now that your water is added in, you want to be sure to add in your spices, but only ONE TABLESPOON AT A TIME! It’s super important that you only do one at a time, because these spices will tend to clump up without thorough mixing. So, be sure to thoroughly mix everything together. I call this petting the masala:

20140411-213542.jpg

At this point in time, you’re going to allow your sauce to reduce some, because you do want it to thicken up just a bit. Once it’s reduced a bit, you want to add in the unsweetened, natural coconut milk. Now that your milk is added in, you’re going to continuously stir and mix the sauce, otherwise you risk your sauce scalding, and your spices clumping up again.

So repeat after me: I will PET THE MASALA SAUCE!

Bring your sauce to a gentle boil, and then reduce the heat to low, and simmer for two hours. Periodically, you may need to add coconut milk to the sauce, but be sure to add it in one tablespoon increments.

HUZZAH, YOUR SAUCE IS DONE!

20140411-214207.jpg

Now all we have to do is bring this together in a cohesive manner. So first, you have to cook your chicken, because raw chicken and a delicious sauce are not especially delicious.

For Cooking Your Chicken:
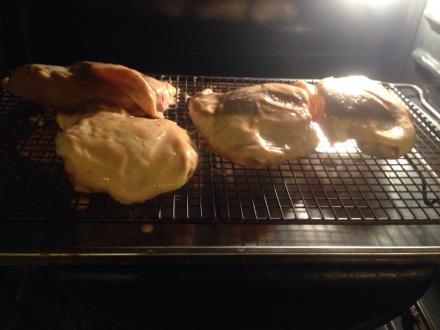
Pre-heat your oven to 425 degrees. Now, place a bottom layer of foil on one large cookie sheet. At this point, I find that using a cookie cooling tray is most effective for evenly cooking your chicken in the oven. So I suggest that you oil your cookie cooling tray with coconut oil (or fat of choice), and place it on top of your cookie sheet.

Then, place your chicken skin side up on the cooling rack (on the cookie sheet) and place it on the center rack of the oven.

20140411-214837.jpg

Now, you’re going to let your chicken cook for a minimum of thirty minutes. Your chicken cooking time is really going to depend on the a few factors: the thickness of your chicken, and the consistency of your oven heat. My chicken thighs actually cooked for an hour.

Once your chicken is done, let it cool ever so briefly, and serve with hot jasmine basmati rice. Now, you can eat your chicken with sauce directly on it, or you can serve it on the side of your sauce covered rice.

20140411-215217.jpg

I happen to like quite a bit sauce on my chicken, so I soaked my nice and crispy chicken in some sauce, and served it on top of some delicious rice (seasoned with a little bit of salt, pepper, coriander seeds, and a little bit of cumin).

20140411-215402.jpg

Now, sit down, and enjoy your delicious homemade Chicken Tikka Masala!