Adventures In Dairy Free Caramel Experiments: Part 3, Sunflower Butter Caramel Cups

Today is candy day!

Now, whether you are religious or not, I think that we can all agree that this weekend is basically the weekend of chocolate gluttony.

However, if you have a collection of annoying allergies such as myself, the five million aisles filled with egg and bunny shaped chocolate goodies is a total no go. 😦

If this makes you a sad velociraptor (WHY a velociraptor you ask? Because today is Velociraptor Awareness Day!!!) like it does me, then this recipe is for YOU!

I call these babies Sunflower Heaven Cups.

NOW, these are INCREDIBLE!

Think of them as the mating of a Cadbury Caramel Egg and a Reese’s Peanut Butter Cup.

Yep, they rock.
And the best part is there are no pesky allergens in this recipe!

There are three separate steps to this recipe. Say what?

First, you need to be sure you grab your Dairy Free Caramel that we made (and hopefully you still have left over) previously in Part 2 of this three part series of candy making. Since it needs to be stored in the refrigerator, you’ll have to nuke it a bit to get it to the right consistency again. I heated mine for roughly one and a half minutes.

20140418-132134.jpg

Now, this recipe itself is pretty easy. In all, it requires only six ingredients. I know, it’s pretty awesome. Also, the whole process between prep work and assembly only takes about thirty minutes total.

What you’ll need:

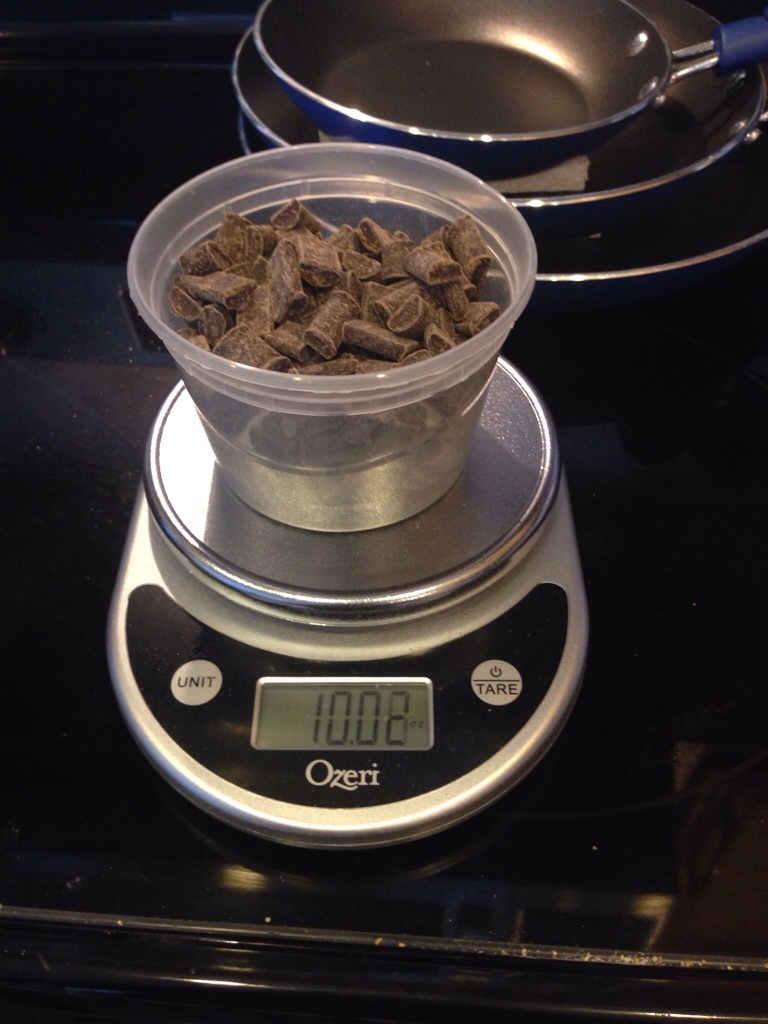
10 ounces of Enjoy Life Semi-Sweet Chocolate Chips
1 cup Sunflower Butter
1/2 cup Powdered Sugar
2 tablespoons Freshly Brewed Espresso
1 teaspoon Vanilla

20140418-132303.jpg

First, let’s prepare our chocolate. I used a food scale to measure out my chocolate.

20140418-132818.jpg

Don’t forget to hit tare!

20140418-132908.jpg

Now, if you’re like me, and you are a total failure at melting chocolate in a pan without scalding it, there is an easy solution guys.

What? You ask.

Setup a ghetto double boiler system, like so:

20140418-132647.jpg

You want to be sure that there is enough of the hot water on the bottom of the second bowl to melt the contents. Otherwise, it will take quite a bit longer to melt your chips if you are relying purely on steam to get the job done. It will work, but it will take longer.

Now, while your chocolate is working on melting, it’s time to prepare your sunflower butter mixture.

Take one cup sunflower butter and mix it with 1/2 cup powdered sugar. I warn you, this is going to become VERY THICK, and will be difficult to adequately mix together.

Which is why now, we will introduce two tablespoons freshly brewed espresso to add a little extra flavor, but also loosen it up a bit more.

This mixture is supposed to be THICK though, so be sure you don’t add too much. If it becomes too runny and less dense, you need to add more sunflower butter and powdered sugar. It needs to have a thickness similar to a cookie dough, in order to stay properly intact in your cups.

Add the 1 teaspoon vanilla to the mixture, and set off to the side for the moment.

20140418-133252.jpg

Once your sunflower butter mixture is finished, and your caramel is all heated up, all you need is for your chocolate to be completely melted and smooth. Don’t add anything to the chocolate. Because it’s difficult to find baking chocolate that is dairy, egg, soy, and nut free, Enjoy Life is the optimum brand, but their chips already come with all the additional tasty stuff, so we are good to go.

20140418-133656.jpg

So at this point, all of our ingredients for assembly are ready to go!

Take your muffin tin with cup liners, your melted chocolate, your sunflower butter filling, and your caramel, and line them up on the counter.

20140418-133750.jpg

Now, I like giant chocolate treats. So I am using a big muffin tin. If you happen to have a mini tin, and mini muffin liners, this recipe will obviously yield tons of Sunflower Heaven Bites (what I like to call the mini version).

First, fill the cup with a bottom layer of chocolate. It needs to be decently filled, otherwise you’ll have your insides sinking to the bottom and the chocolate gushing around it. No bueno.

20140418-134001.jpg

Once you have your bottom layer of chocolate, we’re good to add the first layer of filling: sunflower butter.

Take a small ball, about a tablespoon, and round it out, and flatten it.

20140418-134103.jpg

Place it in the chocolate. DON’T press it in there, just gently set it on top of the chocolate layer.

20140418-134143.jpg

Take a spoonful of caramel (just a spoonful of sugarrrrrr. Name that song!) and cover your sunflower butter layer.

20140418-134229.jpg

Now for the final layer: chocolate again.

20140418-134254.jpg

This recipe will yield roughly 8 Sunflower Heaven Cups. Obviously, depending on how much filling you include you can yield more. I, however, like lots of sunflower and caramel filling, so I used more chocolate to cover it all up.

When everything is done, be sure to put it in the fridge for at least an hour for the chocolate to harden.

20140418-134418.jpg

And finally, when all is said and done, you’ll have an absolutely delectable treat that is gluten free, dairy free, egg free, soy free, peanut free, and nut free.

20140418-134511.jpg

I suggest hiding them. I’m not good at sharing.

20140418-134539.jpg

ENJOY!

Pan Seared Bacon Wrapped Scallops and Oven Roasted Brussels Sprouts

Today, you’re in for a treat.

With the beginnings of Spring budding in the air, it’s time for some light and delicious dinners. Now, I don’t know about you, but I love me some seafood. And bacon.I’m pretty sure that the most wonderful dishes always include some form of shellfish. And the other wonderful dishes include bacon. So why not combine them?

Tonight is no different. Be prepared to salivate. I give to you the following wonders: Pan Seared Bacon Wrapped Scallops served with fresh Oven Roasted Brussels Sprouts and my wonderful mother’s very own recipe for Homemade Gluten Free Corn Bread.

Since I’m doing three separate things here, I’m going to go in a step by step process of how I coordinate different cooking times.

First, we have to prepare our cornbread and get that on to cook. It’s going to be one of the most time consuming items, but it will also sit out on the counter and cool, which frees up your oven space for your Brussels Sprouts in the future.

Side note: the cornbread is a super awesome dessert when drenched in honey and served with hot tea.

Let’s start.

Mama’s Homemade Gluten Free Corn Bread:
1 cup Jules gluten free flour.
1 cup Bob’s red mill gf corn meal,
4-5 tbs sugar ( I like mine sweet so I use 5),
4 tsp baking powder,
1/2 tsp salt.
1 egg or 1 egg replacer,
1 cup milk or equivalent (I like coconut milk for this recipe),
1/4 cup canola oil.

Now, mix all of your dry ingredients together first. If you like, as my mom and I both do, you can make a batch of the dry mix in batches, and store these in ziplock baggies to have around on hand for a quick addition to any meal.

Once your dry ingredients are all combined, set them off to the side for the moment. Now, mix your wet ingredients in a separate bowl, and mix them thoroughly. Go ahead and combine everything together. Be sure to mix thoroughly so there are no possible lumps in your mix.

Don’t forget to oil your pan. And for any of you fellow soy allergy sufferers out there, DON’T FORGET that cooking sprays include soy. I like to take just a little bit of vegetable oil on a paper towel and wipe down my pan.

Bake at 425° for 15-20 minutes or until golden brown.

When done, you should have something wonderfully tasty that looks like this:

20140417-183115.jpg

Now on to the Brussels Sprouts!

First, we’re going to start off with the following ingredients:

3 cups (roughly) washed and halved Brussels Sprouts
2 tablespoons olive oil
1 teaspoon Kosher salt
1 teaspoon garlic powder/black pepper/onion powder mixture
3 strips of bacon

20140417-183532.jpg

Take your Brussels Sprouts and put them in a large bowl with the 2 tablespoons of olive oil. Be sure to get them all equally covered. Then pour in your Kosher salt and your spice mixture to get them all covered deliciously.

Now, take out your bacon.

This is the easy, yet slimy, part. Take the 3 bacon slices and cut them into small strips that will go over the tops of your Brussels Sprouts.

Like so:

20140417-185954.jpg

20140417-190011.jpg

Tip: If your bacon is slightly frozen, it’s much easier to cut up your bacon without it sliding around on you.

Now, set your oven to 400 degrees and cook for 15-20 minutes minutes, when bacon has a nice golden crisp to it, and the Brussels Sprouts are tender when you put a fork through them.

They will look wonderfully delicious, much like the following:

20140417-195829.jpg

On to the Bacon Wrapped Scallops!

This will be the centerpiece of your dinner, at least it is in mine. Feel free to add anything to this meal, like a nice steak or some roasted chicken. However, for me, this is more than enough food.

What you’ll need:
3 large sea scallops
3 pieces of bacon
2 toothpick skewers

20140417-190246.jpg

Now heat up your skillet with one tablespoon of olive oil, and two tablespoons or minced garlic.

20140417-190342.jpg

Once your garlic is effectively browned, put your scallops on to cook. Now, you want to be sure to cook them on a lower heat. Scallops cook very quickly, but you also need to make sure the bacon is fully cooked.

Raw bacon is gross and unhealthy. I like to avoid getting trichinosis. Unless you’re my best friend. She eats her bacon mostly raw, merely warm. I know…ew.

In the end, my scallops came slightly unwrapped, but were still QUITE delicious.

Serve and enjoy.

20140417-195956.jpg

This meal is brought to you by Star Trek: The Wrath of Khan.

Nerd Chefs Unite!

This recipe is: gluten free, egg free, dairy free, soy free, peanut free, tree nut free, and paleo friendly!

Oh So Delicious Chicken Tikka Masala

So world, I apologize for my absence as of late, but life has been a bit hectic as of late. Life has gotten a little crazy, and full of medical bills. I’ve been battling a pretty serious infection, and because of that, I’ve been touring the hospital’s outpatient infusion center with a pic-line in my arm, because sadly I’m so allergic to the world, I’m also allergic to most oral antibiotics. So, IV antibiotics are the only way to go for me!

Sadly, the very tasty Sunflower Butter Caramel Cups are on hold for the moment. But I promise, they will be here next Wednesday, just in time for Easter Sunday, also known as Candy Sunday.

While I’m currently too tired and too drugged up to bake any fantastic creations at the moment, I do have a wonderful prized recipe that I’m ready to share with you all.

Fair warning: this recipe is super delicious and is a really fantastic comfort food.

SO, with that being said, I give you all: Chicken Tikka Masala

Now, whilst invading and occupying India, the British also invaded and took over a few recipes. Chicken Tikka Masala is a dish that is now classically associated with Indian cuisine, but is an Anglicized dish of an original.

Indian food is typically pretty safe for allergies. Why, you ask? Traditional Indian food actually leaves out a fair amount of dairy, and is also predominantly gluten free.

Now, this recipe is a total winner, and happens to be gluten free, dairy free, egg free, soy free, and paleo friendly.

Before we begin, this recipe is split into two parts: marinade for the chicken and the actual masala sauce.

What You’ll Need for the Chicken’s Marinade:

20140411-205916.jpg
4 Chicken Thighs or Boneless Breasts
1 Cup Greek Style Unsweetened Coconut Milk Yogurt
2 Teaspoons Cinnamon
1 Tablespoon Thai Spice Mix
1/2 Tablespoon Masala Spice mix
1 Teaspoon Garlic Powder

Side Note:
if you don’t have Thai Spice on hand (you can find it at your local spice shop or Whole Foods), you can create your own mix with equal measurements of paprika, turmeric, black pepper, coriander, fenugreek, ground mustard seed, cayenne, cumin, and ginger.

If you don’t happen to have Masala Spice on hand (which you can also find at a local spice shop or Whole Foods), you can create your own with a similar, almost identical mixture (though the subtle flavor differences will make a great impact later on). Masala Spice calls for an even mixture of paprika, coriander, turmeric, black pepper, fenugreek, mustard, cumin, cayenne, and ginger.

Now for that marinade! You’re first going to mix together your yogurt and spices in a mixing bowl. Once everything is mixed together nicely, you’ll have a pretty sweet, slightly orange colored marinade. Don’t let that turn you off, it will make your chicken taste AMAZING! So, put your chicken in a 1 gallon plastic bag and dump in your marinade.
At this point, you’re just gonna let your chicken do it’s chicken thing and just sit there in this deliciousness. So, let your chicken marinade either for at least 6 hours or overnight. I highly recommend letting it sit overnight, so that everything can just soak in to it’s full extent.

20140411-213148.jpg

And it’s time for the sauce!

What You Need for Your Tikka Masala Sauce:

1 1/2 Tablespoons Coconut Oil
3 Tablespoons Minced Garlic
2 Freshly Sliced Jalapeños (or to taste)
1 Sliced Red Bell Pepper
1, 8 ounce can of Salt and Sugar Free Crushed Red Tomatoes
3 Tablespoons Masala Spice
3 Tablespoons Thai Spice
1/4 Cup Water
1 Cup Unsweetened Plain Coconut Milk

Sauce Instructions:

First, you’re going to sauté your garlic and jalapeños in your coconut oil. Once your garlic and jalapeños have caramelized, be sure to add in your red bell pepper, and allow it to soften just a bit. Don’t let your red bell pepper caramelize, because it’s going to finish cooking the rest of the way in the sauce.

Once your pepper is added in, and softened up just a tiny bit, add in your crushed red tomato and mix thoroughly. You’re going to sauté the tomatoes, jalapeños, garlic, and red bell pepper just a little bit. Now, you’re going to let everything just sit there and come to a very slight boil on the outer edges. Once everything is boiling ever so slightly, add in the 1/4 cup of water, and mix everything together really well.

Now that your water is added in, you want to be sure to add in your spices, but only ONE TABLESPOON AT A TIME! It’s super important that you only do one at a time, because these spices will tend to clump up without thorough mixing. So, be sure to thoroughly mix everything together. I call this petting the masala:

20140411-213542.jpg

At this point in time, you’re going to allow your sauce to reduce some, because you do want it to thicken up just a bit. Once it’s reduced a bit, you want to add in the unsweetened, natural coconut milk. Now that your milk is added in, you’re going to continuously stir and mix the sauce, otherwise you risk your sauce scalding, and your spices clumping up again.

So repeat after me: I will PET THE MASALA SAUCE!

Bring your sauce to a gentle boil, and then reduce the heat to low, and simmer for two hours. Periodically, you may need to add coconut milk to the sauce, but be sure to add it in one tablespoon increments.

HUZZAH, YOUR SAUCE IS DONE!

20140411-214207.jpg

Now all we have to do is bring this together in a cohesive manner. So first, you have to cook your chicken, because raw chicken and a delicious sauce are not especially delicious.

For Cooking Your Chicken:
Pre-heat your oven to 425 degrees. Now, place a bottom layer of foil on one large cookie sheet. At this point, I find that using a cookie cooling tray is most effective for evenly cooking your chicken in the oven. So I suggest that you oil your cookie cooling tray with coconut oil (or fat of choice), and place it on top of your cookie sheet.

Then, place your chicken skin side up on the cooling rack (on the cookie sheet) and place it on the center rack of the oven.

20140411-214837.jpg

Now, you’re going to let your chicken cook for a minimum of thirty minutes. Your chicken cooking time is really going to depend on the a few factors: the thickness of your chicken, and the consistency of your oven heat. My chicken thighs actually cooked for an hour.

Once your chicken is done, let it cool ever so briefly, and serve with hot jasmine basmati rice. Now, you can eat your chicken with sauce directly on it, or you can serve it on the side of your sauce covered rice.

20140411-215217.jpg

I happen to like quite a bit sauce on my chicken, so I soaked my nice and crispy chicken in some sauce, and served it on top of some delicious rice (seasoned with a little bit of salt, pepper, coriander seeds, and a little bit of cumin).

20140411-215402.jpg

Now, sit down, and enjoy your delicious homemade Chicken Tikka Masala!

When Life Gives You Allergies, Bake a Soufflé…

Alright, though I haven’t tried it, I imagine making an egg-less, flour-less, and dairy-less soufflé would actually be incredibly difficult, and quite possibly no longer qualifying as a soufflé in anyone’s mind.

So, I guess the next best thing would be to pour yourself a stiff drink and occasionally complain to your friends and family about the trials and tribulations of suffering from chronic allergies.

20140329-202417.jpg

Sometimes it’s cathartic to complain about the lemons that life hands you. While I don’t suggest you make a daily habit of venting your frustrations (because honestly, at some point your friends, family, and coworkers will stop caring all together), it can be a good emotional release to get out your frustration.

Me, personally? I complain to my mom about my allergies on a daily basis. Now, the only reason my mom still loves me and listens to these rants, is because the woman is a veritable saint.

Also, peeps, she’s the one who taught me how to cook, and how to create my own recipes, so let’s give that lady a round of applause.

Lately, I’ve been struggling with trying to find a way to be optimistic in the face of so many allergies. I had dealt with being gluten free for over five years before I was diagnosed with my new chronic allergies of dairy, egg, soy, peanut (all legumes on earth, 😦 bye bye hummus), kiwi, and honestly who knows what else. Even finding out these allergies, my body seems to have never recovered.

Every week it’s a new allergy. Since January, I’ve been living in an antihistamine haze, and let me tell you, that’s not nearly as much fun as it should be. Constant sleepiness and itching are not suggested ways to move through life.

But here I am, disproving Darwin on a daily basis. What’s a girl to do when all she wants to do is drink coffee and consume pastries, but she can’t?

20140329-203132.jpg

If only I could find somewhere to eat my emotions in tasty muffins. Sadly, if I want muffins, I have to make those babies myself. Don’t get me wrong, I love baking and cooking in general, but sometimes, I just wish I could run to Starbucks, grab me a caramel macchiato, and a delicious cheese danish, and eat my feelings.

Unfortunately, if I tempted this venture, the poor barista would be sticking me with an epi pen and telling his coworkers the next day how he shot Allison, the Lobster Queen with a shot of epinephrin in between blending frappucinos.

I envy you people and your delicious coffee and pastries.

And if you’re wondering why I’ve dubbed myself lobster royalty without being properly crowned by the lobster pope, it’s because I believe it’s a well earned title. Sadly, I have been hiding under hoodies for the winter season, but spring shall soon be upon us in Colorado, you know…in July, when we maybe stop snowing at random intervals. My allergies turn me into a lobster.

That’s right people: a lobster. Well…I don’t have feelers, and I’m not a bottom feeder, but let me tell you, I look like a perfectly boiled lobster, skin wise at least.

It’s great. If you drenched me in butter (adding to the lobster glow), you could basically serve me up with a steak and pass me off as a slightly larger than average lobster off the coast of Maine.

I know Hannibal Lecter would approve.

I really just want to eat food. I was a horrible foodie before, always trying restaurants, trying new foods, new recipes, new drinks. With one allergy test result from the Mayo Clinic, all that was taken away.

No more restaurant extravaganzas. No more adventurous recipes. No more…food.

Eating out has become a legitimate fear, a social anxiety, and an embarrassment.

It’s been an adjustment to go from eating out every weekend, to trying new restaurants with my brother, going out with friends. I make up excuses now.

Sorry, I have to work.
I’m just not hungry.
Nothing sounds good, I think I’ll just stay in tonight.

I honestly fear eating out in a restaurant. When you eat out with allergies, particularly chronic allergies, you put your life in your waiter and chef’s hands.

I’ve worked in customer service, and I know how tempting it can be to seek revenge on a customer who is particularly difficult, or even just the customer who broke the camel’s back after a long line of crappy customers.

But when you have chronic allergies that can threaten your life, you legitimately depend on your waiter and chef to take a vested interest, care and concern in accommodating you, and to provide you with accurate information.

If any of this fails, eating out can be disastrous, as I have learned.

But eating out with allergies doesn’t only boil down to the fear of getting very sick. It also boils down to the embarrassment of being THAT customer.

Trust me waiters, I know that you have gone back into the kitchen at times with the reaction of “You would NOT believe what someone is asking now…” or some sort of variation thereof.

So let me introduce you to The Apologetic Allergen.

My opening with a server usually starts with “I’m really sorry, but I’m going to be THAT customer tonight… I called ahead, but I really do need you and the chef or manager to confirm that your kitchen can accomadate w,x,y,z allergies…” Trust me when I say that people with chronic allergies don’t BUG AND PESTER out of a desire to be horribly annoying, but out of a desire not to end up with another medical bill.

So please, I beg of you to any server’s who read this, please treat your Apologetic Allergen with respect, understanding, and a vested interest in providing them as safe of an eating out experience as possible. When you do, you’ll find yourself a DEDICATED repeat customer, and someone who will go out of your way to mention to your manager your helpfulness.

Kindness to the Apologetic Allergen pays off people.

At this point in time, my life can pretty much be summed up as follows:

20140329-205401.jpg

It’s funny, but true. Allergies have made me lose control of my life. The only way to combat losing control? Wake up at 4 am and bake. And eat. And bake some more.

While life may not be full of soufflés full of everything wonderful in the world, at least with some insomnia induced chemistry experiments I can create some delicious baked goods.

So, until next time, I bid you adieu my fellow allergy sufferers (or not) and thank you for tuning into the momentary bitterness of a 20-Something Allergic to Life.

This blog post is: full of sarcasm, sour lemons, free of tasty foods, and free of allergens.

Adventures in Dairy Free Caramel Experiments: Part 2, Crockpot Caramel Sauce

I know you’ve all been waiting for the second edition in this adventure, so here it is: a How-To Guide on doing Dairy Free Crockpot Caramel Sauce.

Now, as I’ve told you before, caramel is not dairy free in and of itself. While you may think that caramel is typically just sugar and water that’s been heated and melted down, it actually isn’t. Making caramel sauce can be quite complicated, because it has a tendency to crystalize and solidify, turning into a brittle candy, rather than a nice gooey sauce.

Because of that, I’m trying to simplify this recipe a bit into a more beginner to intermediate cooking level.

Remember, that when we finish this caramel sauce, we’ll be one step closer to our final product in Part 3, which will be A Little Bite of Sunflower Heaven: A Chocolate Covered Sunflower Butter Cup filled with a Gooey Caramel Center.

What you’ll need for this recipe:

1 crockpot (I use a 2 quart crockpot)
1 1/2 cups sugar
4 tablespoons brown sugar
1/3 cup water
1 teaspoon cream of tartar
1 tablespoon corn syrup
4 tablespoons melted coconut butter
1 teaspoon vanilla
1 1/4 cup condensed coconut milk

***Note***
While the ingredients here aren’t paleo, there is an easy way to make it paleo friendly.
What you’ll need to do is substitute raw coconut sugar, and maple syrup or honey instead of corn syrup.

20140326-160418.jpg

And yes, that is a zombie head cookie jar in the background.

If you happen to be wondering why we are including cream of tartar in a caramel sauce recipe, there is a perfectly valid reason. Caramel sauces can be rather fickle and tend to crystalize. By including the cream of tartar and the corn syrup in the sauce, it keeps the sugar from crystalizing in the sauce. Basically, it stabilizes it. If you don’t have cream of tartar on hand, you can substitute 1 teaspoon fresh lemon juice instead.

Now let’s get down to the dirty work.
Prep Time: 10 minutes
Cook Time: 4 – 8 hours

In the crock put, mix together your white sugar, brown sugar, and your cream of tartar.
In a separate bowl mix together your water, melted butter, vanilla, and light corn syrup together.

20140326-162248.jpg

20140326-162258.jpg

Once your sugars are mixed together, add in your wet mix, and stir together in the crock pot. Now turn the heat on that baby high. Be sure to mix it up very well, otherwise you’ll end up with dense clumps of sugar in different spots. So, stir and enjoy the nice creamy look and texture of it.

20140326-162959.jpg

While your crockpot warms up, go ahead and place your previously made condensed coconut milk (hopefully stored in a glass mason jar), in a pot of warm water, to loosen it up a bit. Once your condensed coconut milk is warmed up, add it into your crockpot mixture and stir together.

Don’t use a metal spoon, because it conducts heat and can pull out the heat from your sugar mixture. Wooden spoon would work, but I’m not a fan of them because they tend to store germs, and also sap out the moisture from your mixture.
What do I suggest? A silicone spoon.

Set on high and let sit for 4-8 hours, depending on your desired caramel darkness and flavor.
Be sure to check on your mixture every hour or so in order to stir it and avoid any burning on the bottom of your crock pot (due to hot spots in the ceramic)

Your sauce mixture should be a really nice creamy color, and should smell absolutely wonderful.

20140326-163227.jpg

Now, it is of vital importance that you just let your caramel do it’s very own little caramel-y thing. Every time you remove the lid from the crockpot you will be letting the heat escape from the sauce, causing it to evaporate faster and risking your sauce burning, or crystalizing due to too little liquid.
After about two and a half hours, you should have a nice, bubbly mixture like so:

20140326-175030.jpg

If you happen to have a larger crockpot than I do, here is another viable setup for you:
Another way to set up your crockpot:
4-6 quart crockpot double boiler.

What you’ll need is another ceramic 2 quart pot or 2 quart glass pot. Mix together your ingredients as described, in the pot. Put it the pot in your crockpot, and slowly fill up water until it’s about two inches from the top of the pot inside. Turn the heat on high, and continue to cook for 4-8 hours, depending on your desired caramel darkness and flavor. With the double boiler, you will be able to let it sit for the full time without periodically stirring.

Now, after about four hours of simmering, my sauce had a beautiful light caramel-y color to it.

20140326-190500.jpg

But, the thickness and the color weren’t quite to my liking, so I let mine sit for a bit longer. Consequently, I let it cook for another two hours. For me, my caramel turned into a nice medium/dark color, with a wonderful sweetness.

20140326-211052.jpg

Say hello to some wonderfully tasty caramel, and don’t forget to say hello to Eduardo the Zombie Jar too.

Now, to let you all know, in all my caramel research I did discover another way to make crockpot caramel, and it’s insanely easy as well.
If you fill your crockpot with water, and place your cans or jars of condensed milk in the crockpot on high, for 4-6 hours, it will turn into caramel on its own. I haven’t tested this as of yet, so if you happen to try it and enjoy it, please comment with the results!

Enjoy this caramel with:
-ice cream
-coffee
-apples, bananas, strawberries, fruits
-pastries (if you can eat them)
-chocolate

Remember to stay tuned in for PART THREE where we make delicious bites of Sunflower Heaven: a mixture between a peanut butter cup and a Cadbury egg.

This recipe is gluten free, dairy free, egg free, soy free, nut free, and paleo friendly.

Let’s Celebrate International Waffle Day: Belgian Style Coffee Cinnamon Pumpkin Waffles

If you didn’t get the news update guys, today is a super important day: International Waffle Day!!!!

So, while it may be 10:15 at night when I’m writing this, because I didn’t get home from a twelve hour shift at work until 9:00, it’s still a perfectly good reason to fix waffles. And honestly, who doesn’t love breakfast for dinner??

Once I heard it was an international celebration of the glorious breakfast/brunch food of waffles, I knew it was done: waffles were happening.

So, as I sat at work, in my cubicle of a call center, slinging TiVos like they’re crack-cocaine, and dealing with the general jerk-world of customer service, I thought up this little recipe.

And let me tell you guys…. these waffles are AMAZING!!!!
Seriously, I bit into these babies, and OH-MY-GOD, I thought I had died and gone to heaven. Even though these puppies are gluten free, dairy free, egg free, soy free, and nut free, they are TO DIE FOR, and a for sure hit for any family brunch or friendly get together.

Shall we start? Let me introduce you to some amazingly tasty NOMS:

BELGIAN STYLE COFFEE CINNAMON PUMPKIN WAFFLES.

What you’ll need:

20140325-222017.jpg

-2 1/2 cups Namaste gluten free flour mix for waffles and pancakes
-3 tablespoons light brown sugar, packed
-2 1/2 tablespoons cinnamon
-2 Energe egg replacers (or 2 eggs)
-1/2 cup cold brewed iced coffee
-1/4 cup coconut or rice milk
-2 tablespoons applesauce (or 2 tablespoons melted, and cooled butter)
-1 teaspoon pure vanilla
-1 can pureed organic pumpkin (with no additives)

You will also need a waffle maker (duh), and 1 tablespoon of coconut oil to oil it all up. Remember that cooking sprays are NOT soy free.

Now, while this may seem like quite a few ingredients just to have some waffles, let me tell you, it’s typically your around the house ingredients, and the prep time is not that involved.

Prep Time: 15 minutes
Cook Time: Roughly 5 – 10 minutes (depending on your crunchiness desire)

Now, mix together all your dry stuff. You can either put your dry mix or your wet mix in the big bowl, but either way, you’re going to want to eventually combine everything in a big bowl.

So, after you’ve mixed together your flour, brown sugar, and cinnamon, set it off to the side for a moment.

Mix your wet ingredients all together now: take your brewed coffee, milk, applesauce, and vanilla. DO NOT ADD IN YOUR PUMPKIN YET!!!! At this point in time, mix together your Energe egg replacer mixture (3 teaspoons replacer to 4 tablespoons of warm water).

20140325-223935.jpg

Now that everything is mixed together separately, combine your ingredients into a nice fluffy mixture. Once it’s all fluffy and has an awesome cloud like texture, you want to slowly add in the pumpkin, about a half cup at a time.

20140325-224320.jpg

Once you have mixed in the entire can of pureed pumpkin, you want to oil your waffle maker. Be sure you haven’t pre-heated it already, otherwise that would be rather uncomfortable…

First, you want to take your 1 tablespoon of coconut oil and heat it in the microwave for about 30 seconds. The reason you are heating it up is because coconut oil is in a solid state at room temperature, and needs just a bit of heat to become a liquid. Now, you can take either a pastry brush or a folded paper towel and oil up the grooves.

I’m poor and don’t have a pastry brush, so I lovingly oiled up all the little nook and crannies of my waffle maker.

20140325-224610.jpg

At this point in time, take your delicious smelling, slightly orange waffle mix, and put it in the waffle maker. It’s going to be rather thick, so about 1/3 to 2/3 cup mix is a good amount to use. Be sure you spread it out, because it’s not as runny as normal waffles, so it needs to be shaped just a wee bit.

**Note**
You could totally make this moment awkward and amusing with a special someone if you recreate the pottery scene from ghost with waffle mix.
If you happen to do this: PLEASE POST A YOUTUBE LINK NOW.
Just a suggestion.

20140325-224954.jpg

Alrighty, so we’re in the home stretch you guys.
Let your waffles cook for roughly 5-8 minutes. It is a much thicker batter, so they need to cook a bit longer in order to cook all the way through. Also, it makes them deliciously crispy (which is the best way to have a Belgian style waffles).

Once they are all done, you want to take them out.

Be sure to butter them (either with the real stuff or with vegan soy free butter replacement), and either slather with maple syrup, or cinnamon sugar.

I used cinnamon sugar and a wee bit of powdered sugar, and damn was it GOOD!

20140325-225253.jpg

Serve with:
-hot tea
-coffee
-a shot of espresso
-chai tea
-hot cocoa
-milk

AND ENJOY!!!!

This recipe is: vegan, paleo friendly, gluten free, dairy free, egg free, soy free, nut free, and FULL OF TASTINESS!

Adventures in Dairy Free Caramel Experiments: Part 1, Making Your Own Condensed Coconut Milk

Good Day My Allergy Prone Foodies! (Or not so prone if you’re inclined that way.)

Spring has sprung, and is finally upon us. What does this mean? It is time to start making caramel and chocolate combinations in preparation for all of those sweet treats you’ll be bombarded with at the grocery store.

One little problem: caramel is not dairy free.
Sadly, neither is chocolate (most of the time).

Don’t fret my lovelies, I’ve come up with a solution! And that solution will be delicious. After this three part blog series, we will end up with Dark Chocolate Sunflower Butter and Caramel Cups.

Think of Reese’s Peanut Butter cups mating with Cadbury eggs. Yum.

Now, caramel sauce recipes, and caramel in general will call for condensed milk in order to actually make the caramel. It’s important that you used condensed milk, rather than just normal milk, because the process of condensing milk actually changes it into an entirely different product.

So the question here is, how do you make dairy free condensed milk?

Well, question asked question answered. You make condensed coconut milk.

How do you make condensed coconut milk, though, you ask?

Simply! Let me show you how:

Ingredients:
-Thai Kitchen Organic Unsweetened Coconut Milk
-1 teaspoon pure vanilla
-1/3 – 1/2 cup refined cane sugar (or maple syrup or honey to make this recipe paleo friendly)
-1 tablespoon brown sugar (not required, but adds a nice pinch of sweetness)

20140321-091243.jpg

Prep Time: 5 minutes
Cook Time: Roughly 1 hour and 15 minutes

What To Do:

At this point in time, you’ll want to open your can of unsweetened coconut milk, and put it in a medium sauce pan.

Just a warning, it’s going to be a whee bit thick. Actually, it looks a bit like Crisco, so prepare yourself young padawan.

20140321-092049.jpg

Pour in your refined cane sugar (or sugar of choice), your brown sugar, and vanilla into the sauce pan. Heat on medium high heat until coconut milk and sugar has completely melted together. Once you have some bubbles around the edges of your delicious concoction, turn your temperature down to the lowest setting you have.

Now, your coconut milk will sit on the stove for about an hour (remember on the lowest setting), stirring every 5-10 minutes to help the evaporation process for your milk.

You’ll know that your coconut milk is deliciously condensed when it has thickened up and has a sweet smooth soft color to it. It will look a bit silky and have a slightly soft caramel color to it (even though it isn’t caramel yet).

Once it’s ready to go, you’ll pour it into a mason jar.

20140321-095850.jpg

Now that you have condensed coconut milk, it will store in the refrigerator for roughly a week. You want to be sure to use it before it goes bad, or else you’ll have wasted all your time and effort to make homemade condensed coconut milk.

You’ll be able to use this in:
-pumpkin pie
-sweet potato pie
-coffee
-mix with a bit of dairy free/soy free cocoa mix
-AND IN CARAMEL SAUCE!!

Stay tuned for the next installment in Adventures In Dairy Free Caramel: Part 2, Caramel Sauce!

20140321-093614.jpg

This recipe is: gluten free, dairy free, egg free, soy free, legume free, and paleo friendly.

Sunflower Butter Espresso Chocolate Chip Cookies

So, it should be known that I have a horrible sweet tooth. I’m a certified choco-holic, with a particular love for cookies and baked goods. With that being said, I’ve been missing my tasty sweet treats as of late.

Since my diagnosis of like a bajillion new allergies, I have yet to eat any cookie worth the name of a cookie. As a consequence, I have spent my day off from work gathering random kitchen supplies to bring to you cookies so delicious, you won’t be able to tell that they are dairy, egg, soy, peanut (all legume), and gluten free!

Now let me tell you peeps, while making these cookies I thought they would turn out alright, just a bit decent; but I was pleasantly surprised. These turned out so delicious that I turned into a veritable Cookie Monster.

Five cookies mysteriously disappeared. No idea what happened to them guys.

20140320-140618.jpg

So what we have here is a collection of delicious cookies. I’ll give you the recipe for how to make them dairy, egg, soy, peanut, and gluten free, however, I’ll also give you the way to make them full of all those goodies, if you happen to be so inclined.

What you will need:
1 box of King Arthur cookie mix (processed in a factory free of the 8 common allergens, so it’s safe and gluten free)
1/2 cup applesauce (or butter if you can)
1 egg replacer (or 1 egg)
2 tablespoons of freshly brewed coffee (I used espresso for a stronger flavor)
1/2 cup Sunflower Butter
1 cup Enjoy Life chocolate chips

20140320-141138.jpg

First things first, preheat the oven to 350 degrees,and then you’ll want to take half of your flour mix (about 1 and 1/2 cups) and mix it with your applesauce (or softened butter). Once you’ve created a nice smooth mixture. While that is all mixing together, mix together your egg replace (1 1/2 teaspoons of Energe egg replacer to 2 tablespoons warm water).

Once you mix in your egg replacer (or egg), you’ll also want to mix in your 2 tablespoons of freshly brewed coffee, and add in the remainder of your flour mixture.

Now, it’s of vital importance that you let this all mix together for at least a good two minutes. With gluten free flours, they tend to be grainier than wheat flours due to the difference in textures. The most common ingredients in gluten free flours are tapioca starch, potato starch, tapioca flour, and xanthum gum (for your binder). Now, these have a slightly grittier texture than wheat flour, and subsequently, you need to BLEND THAT MIXTURE until it is nice and smooth.

Here is the fun part: measure out a 1/2 cup of Sunflower Butter and mix it until smooth. Now, the sunflower butter will make the batter very thick. At this point in time, I actually added an additional tablespoon of espresso, because my batter was a bit too thick, so be sure to follow what you need.

Once your sunflower butter is mixed together thoroughly, you will want to add in the chocolate chips. I’m a big fan of chocolate chips, so I added in a good 1 cup and change of chocolate chips.

At this point in time, don’t over mix. If you mix to vigorously, your chips will actually start to melt a whee bit, and we definitely want to wait for that to happen in the oven.

Now, you’re ready to put them all on the cookie sheet, roughly 2 inches apart. Be sure you’ve lined your cookie sheet with parchment paper, or else you will never get those babies off the cookie sheet.

Your cookies will need to cook at 350 for roughly 10-14 minutes depending on your location.

When they are golden on the very edges, you will need to take them out, and place them on a cooling tray.

This recipe will yield about 24 cookies.
Or you can bake half of them, and place the remainder of your dough in an airtight container for a rainy day (which is what I did).

The best part of these cookies is you can eat them as still warm and gooey, because there isn’t any egg to risk salmonella!

Eat and enjoy with a hot cup of coffee. 🙂

This recipe is: gluten free, egg free, dairy free, egg free, soy free, peanut/legume free.
Remember, if you aren’t allergic to the world, modify your cookies to contain all those tasty allergens for a truly premium cookie!

An Experimental Breakfast: Brown Sugar Cinnamon Pancakes

20140313-112457.jpg

Let me start off my saying, that a bought of insomnia spawned these babies this morning: Brown Sugar Cinnamon Pancakes free of dairy, egg, soy, peanut, and gluten.

What you’ll need to start off:
-2 cups Namaste (or brand of choice) gluten free/soy free pancake flour mix
-3/4 cup of Rice Milk or water
-Energe (soy free) egg replacer (1 1/2 teaspoon to 2 tablespoons warm water mixture = 1 egg)
-2 tablespoons vegetable oil
-2 large spoonfuls of organic apple sauce (don’t forget to check your labels!)
-2 teaspoons all natural, gluten free organic vanilla (mine is a gigantic bottle from Mexico, mm mm good!)
-4 teaspoons brown sugar
-2 tablespoons homemade cinnamon sugar

20140313-113059.jpg

First things first…get all your wet ingredients prepped first.

Pour the oil in your medium sized mixing bowl of choice.

In a small cup, measure out your egg replacer. This recipe calls for two eggs. What this equals is: 6 teaspoons of Energe Soy Free Egg Replacer to 4 tablespoons of warm water. DO NOT mix your replacer together quite yet, just set off the dry mixture to the side for a moment.

It is very important that you use warm (NOT HOT AND NOT COLD) water, or else your mixture will not have the same physical texture of an egg, and will not have that magical “egg” like quality that allows your baked goods to poof up a bit.

Pour in your vanilla, and then dump in your two spoonfuls of apple sauce.

Once you’ve poured in your vanilla, you’ll want to add the 4 tablespoons of warm water to your Energe Soy Free Egg Replacer. Be sure to stir it for a good thirty seconds to get rid of any clumps that may form in the mixture. When it’s properly mixed, it will resemble something along the lines of a frothy milk/cement glue mixture (tasty image I know, but it’s pretty accurate).

20140313-113813.jpg

Dump it in the mixing bowl, and stir it all about…

Then add in your Rice Milk (or dairy free replacement of choice).

20140313-113908.jpg

At this point in time, you’ll want to mix everything in together, so that all your liquids are really well combined.

WE’RE ALMOST DONE!

It’s time to pour in the final ingredient: THE FLOUR!.
Now, I personally like to pour my flour in small quantities so that everything mixes together and is smooth, rather than having clumpy spots.

So, if you would like to follow suit, pour in your flour in 1/2 cup increments.

20140313-114218.jpg

Once all of your flour is mixed in with your liquids, it’s time to add the sweet bits!

-Add in 4 teaspoons of brown sugar, and 2 tablespoons of homemade cinnamon sugar. Be sure to mix it all together really well.

20140313-114345.jpg

20140313-114358.jpg

I know it’s been a process just to get some pancakes, but stick with me, because we’re almost done, and you will be well rewarded!

At this point in time, you want to fire up a small skillet, grab your ghee, and your mixing bowl.

20140313-114509.jpg

Now, if you’re like me and you had NEVER heard of ghee until either this recipe, or just recently, we’ll take a very minor detour on a history of butter.

Ghee is a classic Indian process of taking butter (which is processed from cow’s milk), and clarifying it through boiling the butter, straining it multiple times through cheesecloth, and setting it aside to process on it’s own.

Now I know what you’re thinking: “Allison…dairy…cows…butter…WHAT ARE YOU THINKING!?”

Well, I’ll keep you updated, because this is my first time trying ghee. Ghee is supposed to remove all of the complicated dairy bits of butter, and leave you with basically a solidified oil/fat that can retains some of the aromatic deliciousness that comes with butter.

BACK TO THE BAKING!

So, take just a sliver of ghee and heat it in your skillet. You don’t need much, it only takes a teeny tiny amount to create this oily mess (honestly, much more effective than normal dairy-filled butter).

Then put in about 2 1/2 large spoonfuls of batter into the pan. Let your listless pancake sit for a bit until you see a multitude of bubbles frothing forth in the batter, and you have some nice golden edges going on around the sides.

20140313-115945.jpg

NOW FLIP THOSE BABIES!

Once you’re done, you’ll have some nice, golden, crispy (albeit a bit thin) pancakes.

Be sure to top them with a bit of soy free, dairy free butter (I’m a bit fond of the Earth Balance Soy Free brand), and top your brown sugar cinnamon pancakes FREE OF EVERYTHING with a bit of locally made and organic strawberry syrup. My favorite brand is from a local store here in Colorado as you climb the canyon to Estes Park, known as The Cherry Store, because they always use organic, locally grown products, with no unnecessary additives!

Butter, syrup, and om nom nom away!

20140313-120038.jpg

This recipe will make about 10 pancakes that are really great when reheated in a toaster, or in a skillet again.

Soy: The Secret Ingredient in Basically Everything

Have you ever bothered to actually read the labels on your food? And by read, I don’t mean looking at the calorie content, maybe the serving size, possibly even the fiber/carbohydrate/sugar content.

I’m going to go ahead and take a guess and say no. Most people don’t actually have a reason to read their food labels. Sometimes it’s trendy, as it was for so long with gluten free, and it now is with paleo. There seems to be a stigma against the people you see standing in the aisle reading their food labels, trying to understand the intricacies of chemical names for ingredients.

What you may not always realize, is that for some people there is a legitimate reason to be an avid label reader. It’s not always some lady and/or man who is the obsessive ingredient jerk at Whole Foods. Sometimes, you’ll get the apologetic allergen as I like to call them. These people are otherwise known as individuals with legitimate allergies, who aren’t trying to be rude, but trying to avoid a hospital visit.

Now, it’s moderately easy to accommodate gluten free diets these days, at least in a state as health conscious/friendly as Colorado; but when you add in dairy, egg, peanut, and soy, reading labels gets much more difficult (as well as depressing).

Optimistically, it is possible find gluten free, dairy free, nut free foods (though these seem to be buried in the back of the freezer section). It’s difficult, but you can find them. Add in egg free? That is an ingredient that can seriously mess up any hopeful products you may find.

How about soy?

Now soy, that shit is in everything.

If you’ve never had a reason to look before, look now.

Soy can be found in the following non-consumable products:
-makeup
-Chapstick
-lipstick
-face wash
-lotion
-shampoo/conditioner
-medications (yes, I know you consume these, but they aren’t tasty, so they don’t qualify)

As for soy in consumable items? It’s almost impossible to escape. Almost, but not entirely so; however, it can be rather disheartening to read labels when looking for food.

Soy is used as a preservative, an emulsifier, for coloring, for added “health benefits”, and for what just seems to be general corporate desire to overuse one particular ingredient.

When reading labels, even if it states that the product is soy free, it is of vital importance to still read the ingredient list.

“But why Allison? Why would I have to read the label if the front of the package tells me it’s soy free?”

Companies can label their product as being soy free while it still contains soy lecithin. It’s of a general consensus that the amount of soy contained in soy lecithin is so minimal that even an individual with a soy allergy can still consume the product with minimal to no harm.

Now, this may be true for you, and to that I say “Good on ye’ mate!”

However, depending on the severity of your allergy, it should no be risked, because there remains enough soy content to still cause a reaction.

Sadly, soy lecithin is used in the processing of chocolate.

So what’s a girl to do in a world now bereft of chocolate, and the necessary equipment for pastries and baked goods? Cooking and baking free of soy, dairy, egg, peanut (all legumes in general, really) is definitely a system of trial and error.

The main idea here is, you need to be aware of what is actually going into your body, even if you don’t have allergies!